[Learning] Simple MBR And Bootloader: Something Before Analyzing Petya
Last Update:
Word Count:
Read Time:
Introduction
Recently, I have been analyzing Petya and NotPetya. Unlike WannaCry, Petya and NotPetya contain low-level components that directly modify disk structures and operating system behavior. So, understanding these malware requires knowledge of low-level system internals.
Therefore, I decided to write this article to document my learning journey. It also serves as a reference for my ongoing study.
Terminology
This section introduces several key terms used throughout this article.
Disk Sector
In computer disk storage, a sector is a subdivision of a track on a magnetic disk or optical disc.
For most disks, each sector stores a fixed amount of user-accessible data, traditionally 512 bytes for Hard Disk Drives (HDDs), and 2048 bytes for CD-ROMs, DVD-ROMs, and BD-ROMs. Newer HDDs and SSDs use 4096-byte sectors, known as Advanced Format (AF). 1

Boot Sector
A boot sector is the sector of a persistent data storage device which contains machine code to be loaded into Random-Access Memory (RAM) and then executed by a computer system’s built-in firmware (e.g., the BIOS).
Usually, the first sector of the hard disk is the boot sector, regardless of sector size (512 or 4096 bytes) and partitioning flavor (MBR or GPT). 2 6
Disk Partitioning (Slicing)
Disk partitioning (or slicing) is the creation of one or more regions on secondary storage, so that each region can be managed separately. These regions are called partitions.
It is typically the first step when preparing a newly installed disk, before creating any file systems. 3 5 6
Mass Storage
In computing, mass storage refers to the storage of large amounts of data in persisting and machine-readable fashion. In general, the term “mass” is used to mean in relation to contemporaneous Hard Disk Drives (HDDs), but it has also been used to mean large relative to the size of primary memory as for example with floppy disk. 4
Master Boot Record
A Master Boot Record (MBR) is a type of boot sector in the first block of partitioned computer mass storage devices like fixed disks or removable drives intended for use with IBM PC-compatible systems and beyond.
Note: The concept of MBRs was publicly introduced in 1983 with PC DOS 2.0
The MBR holds the information on how the disc’s sectors (a.k.a. blocks) are divided into partitions, each partition notionally containing a file system. 6
MBR also contains executable code to function as a loader for the installed operating system, usually by passing control over the loader’s second stage, or in conjunction with each partition’s volume boot record (VBR). This MBR code is usually referred to as a boot loader. 4 5
Experimental Environment
This article demonstrates how Petya modifies the MBR.
As with general malware analysis, this type of modification directly affects physical disks. Therefore, using a virtual machine is essential to ensure system safety.
Despite that, it may still lead to unexpected issues within the virtual machine. During my analysis of Petya, I executed it inside a virtual machine. After using snapshots, I encountered an issue where the snapshot system became unstable and required restarting VMware Workstation to function properly again.
This demonstrates that boot-level malware can interfere with virtualization snapshot mechanisms due to low-level disk modifications.
QEMU
QEMU (Quick Emulator) is used in this article for simulating boot loader. You can use the commands below to install this tool:
1 | |
Example of MBR (NASM)
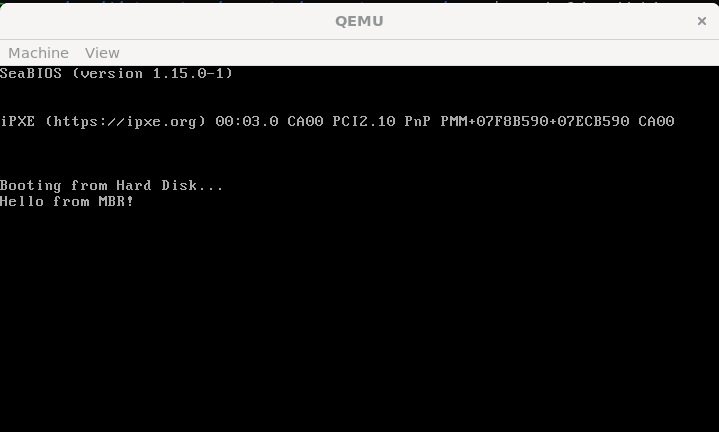
This is a minimal “Hello World” example of an MBR program written in assembly.
1 | |
1 | |
The demonistration is shown below:
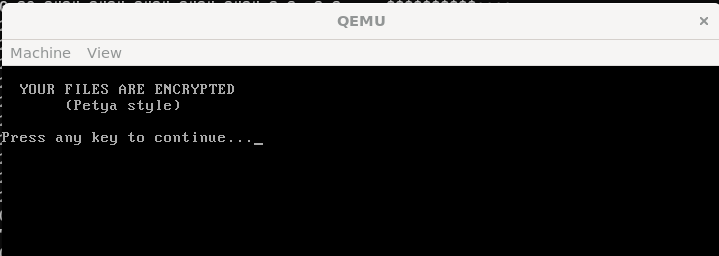
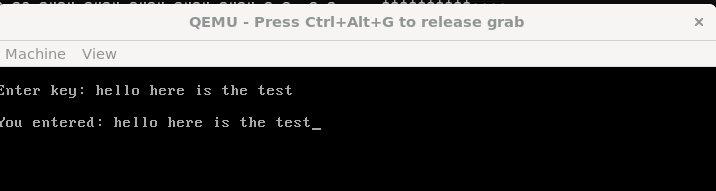
Next, I rewrote the script to include a fake CHKDSK message and basic input functionality:
1 | |
1 | |
The demonstration is shown below:
Note that the maximum size of MBR is 512 bytes. To simulate Petya-like boot-level behavior, I constructed a raw disk image containing both the MBR (stage 1) and the second-stage payload (stage 2).
1 | |
1 | |
Source of the ASCII art: this GitHub gist
Compile both assembly scripts:
1 | |
Initially, I created the disk image (final payload) by simply concatenating stage1 and stage2 binaries using the commands below:
1 | |
1 | |
However, it did not executed properly in my experiment. This approach does not guarantee that stage2 begins at a sector boundary. Since the BIOS reads data in 512-byte sectors, stage2 must be explicitly written starting from sector 2 (using tools like dd with seek=1)
Without proper alignment, the bootloader ends up loading incorrect data, which leads to a silent failure (e.g., only a blinking cursor).
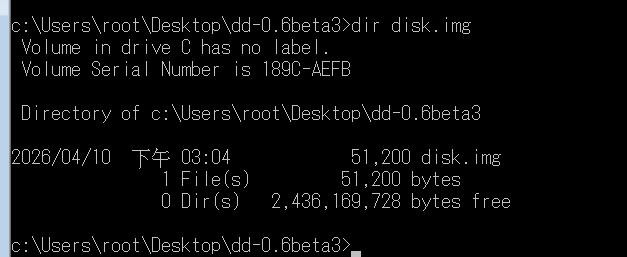
The correct building procedure using “dd for Windows” is shown below:
1 | |
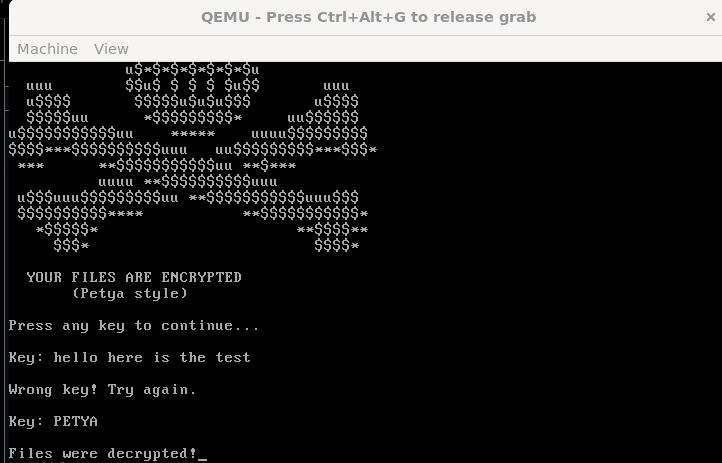
Execute the payload with qemu:
1 | |
The demonstration is shown below:
Using “dd for Windows”, the image can be written directly to a virtual disk:
Cautious: Warning: This operation may damage your physical drive. Always perform this in a virtual machine.
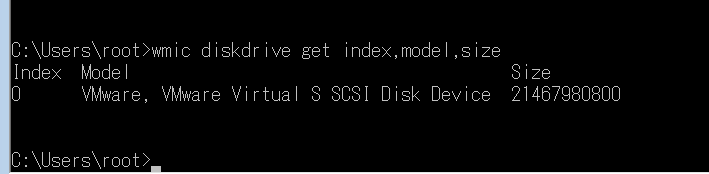
Check the index of your available physical disks:
1 | |
Again…
PLEASE DO THIS IN YOUR VIRTUAL MACHINE!
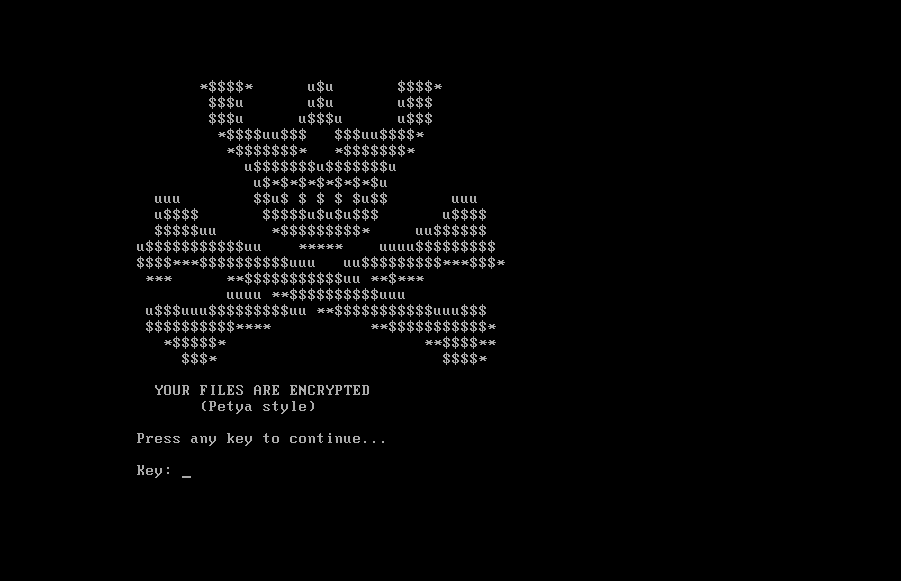
1 | |

After restarting my virtual machine, the loader was successfully loaded:
Conclusion
This article demonstrates how boot-level malware like Petya can manipulate disk structures at a very early stage of the system boot process.
In this article, I built a minimal bootloader from scratch and explored how execution begins at the MBR level. More importantly, I reproduced a simplified stage1 → stage2 loading mechanism, which closely reflects how real-world boot-level malware (such as Petya) operates.
One key takeaway from this experiment is that low-level details, such as sector alignment, are critical. A small mistake (e.g., improperly placing stage2 across sector boundaries) can completely break the execution flow, resulting in silent failures. This also explains why analyzing bootkits and MBR-based malware requires not only assembly knowledge, but also an understanding of how BIOS interacts with disk structures.
With this foundation, we are now ready to move forward and analyze how Petya leverages these techniques to hijack the boot process and take control of the system before the operating system even loads.
If you have any comments or suggestions, please feel free to leave them below!
References
1. https://en.wikipedia.org/wiki/Disk_sector ↩
2. https://en.wikipedia.org/wiki/Boot_sector ↩
3. https://en.wikipedia.org/wiki/Disk_partitioning ↩
4. https://en.wikipedia.org/wiki/Mass_storage ↩
5. Operating Systems: Three Easy Pieces. Remzi H. Arpaci-Dusseau and Andrea C. Arpaci-Dusseau (University of Wisconsin-Madison) ↩
6. How Linux Works : What Every Superuser Should Know, 3/e, No Starch Press ↩
7. PC Assembly Language, Paul A. Carter ↩
THANKS FOR READING