[Studying] Analyzing Sub7 (SubSeven)
Last Update:
Word Count:
Read Time:
Introduction
This article is part of my series: Inside Different Generations of RATs. If you are interested in the full series, please visit the linked page.

Sub7
Sub7 (SubSeven/Sub7Server) is a remote access trojan which was originally released in Februry 1999.
Starting with version 2.1 (1999) it could be controlled via IRC. It works on the Windows 9x and Windows NT operating systems.
Many versions were released over time. The latest release is version 2.3. In this article, I analyzed version 2.0, since it is the only ersion that functions properly in my test environment.
Experimental Environment
To safely conduct malware analysis, the environment should be isolated using virtual machines. Under no circumstances should malware be executed on a personal or production system.
| Tool | Description |
|---|---|
| ExeInfo | Static analysis tool for examing PE file |
| DIE (Detect It Easy) | Static analysis tool for examing PE file |
| CFF Explorer | PE file editor and analyzer developed by NTCore, supporting 32-bit/64-bit executables and .NET assemblies |
| UPX | Executable packer/unpacker |
| AsDie | ASPack detection tool |
| Wireshark | Network protocol analyzer used to capture and inspect live or recorded traffic |
| OllyDbg | 32-bit user-mode debugger |
| x32dbg | 32-bit debugger |
| Ghidra | Open-source software reverse engineering framework developed by the NSA |
| Device | IP Address | Description |
|---|---|---|
| Windows XP | 192.168.85.2 | Victim machine used for executing both the controller and payload |
| Windows 10 x64 (VM) | 192.168.85.3 | Analysis machine used for reverse engineering |
If you want to know how to set up your experimental enviroment, please view:
- How to Setup Your Experimental Environment for Malware Analysis
- Installing VMware Tools on Windows XP and Windows 95 with VMware WorkStation 17

Usage
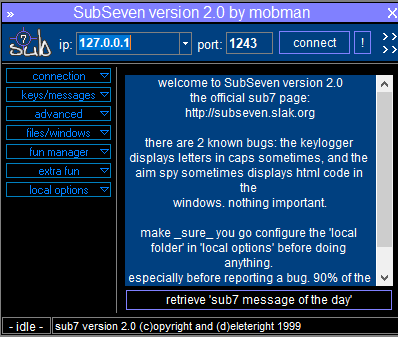
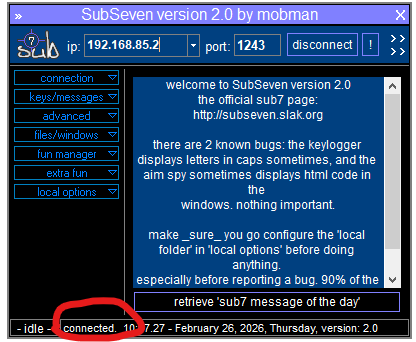
The GUI of client (attacker-side) is illustrated below:
Before we deploy the payload, we need to configure it. Launch EditServer.exe:
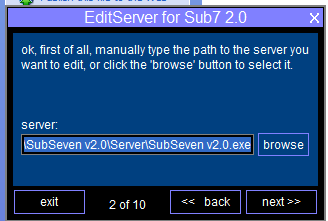
Here, the term “Server” might be confusing from a modern perspective. In early-generation RATs, a “server” executable referred to the payload deployed on the victim machine, while a “client” referred to an application used for controlling the victim machines. As firewall technologies evolved and network security improved, attackers gradually shifted from direct connections to reverse connections.
To avoid confusing, this article uses the terms:
- Controller: attacker-side application
- Payload: executable deployed on the victim machines
Note that Sub7 2.3 provides Normal and Advanced configuration:
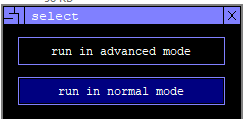

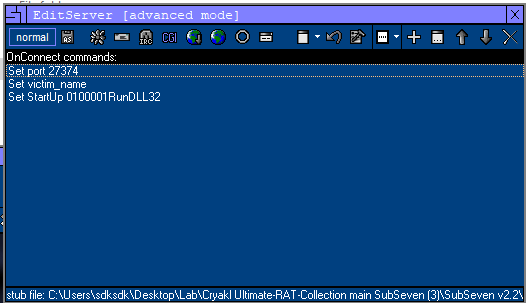
Normal mode provides most of the commonly used options, while Advanced mode allows the use of a downloader and enables appending commands to the payload for execution during the initial deployment stage.
The configuration wizard also provides persistence and plugin functionality:

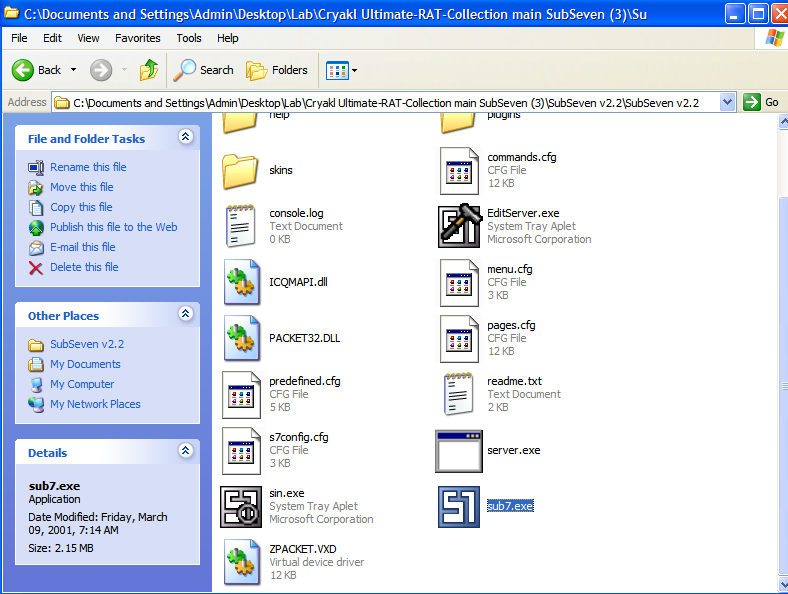
Here server.exe is the stub for building a payload. The principle is straightforward: the builder modifies server.exe and saves the result as a new executable file.
After building the payload, deploy it on the target machine (Windows XP).
Once you connected to the payload, you can see the message at the bottom of the GUI (commonly referred to as the StatusStrip in Windows application development):
Protocol Analysis
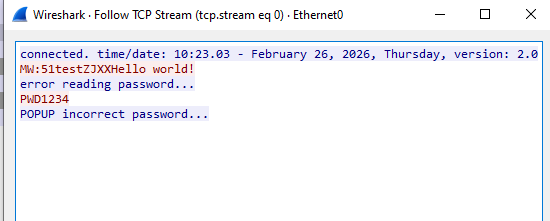
The communication channel is not encrypted. Data is transmitted in plain text:
Reverse Engineering
Unpacking
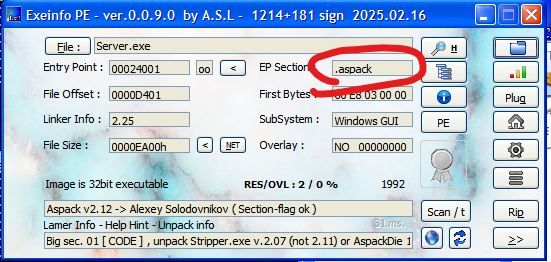
Open Server.exe using ExeInfo and DIE (Detect It Easy):
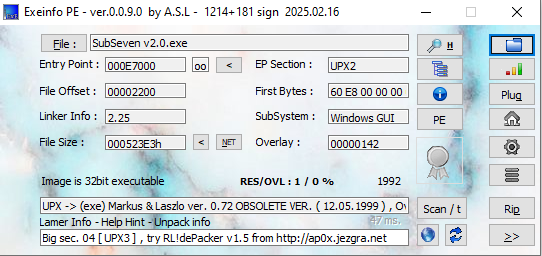
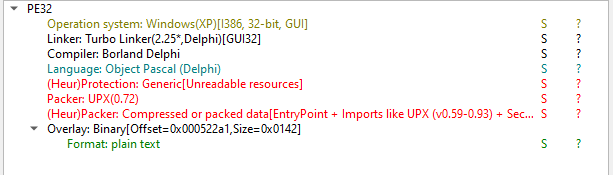
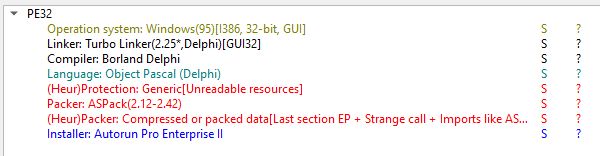
Both tools confirm that the payload was compiled by Object Pascal (Delphi) and packed by UPX. However, version 2.3 is packed by ASPack:
Unpacking UPX and older version of ASPack is relatively easy nowadays, as many tools are publicly available…
Well, the truth is: in my case, the UPX tool failed to unpack the payload:

I tried UPX5.1.0 and UPX3.0, but encountered the same exception:
CantUnpackException: this program is packed with an obsolete version and cannot be unpacked
Therefore, I started learning how to manually unpack the payload using x32dbg (since this is a 32-bit PE file), OllyDbg and Scylla:
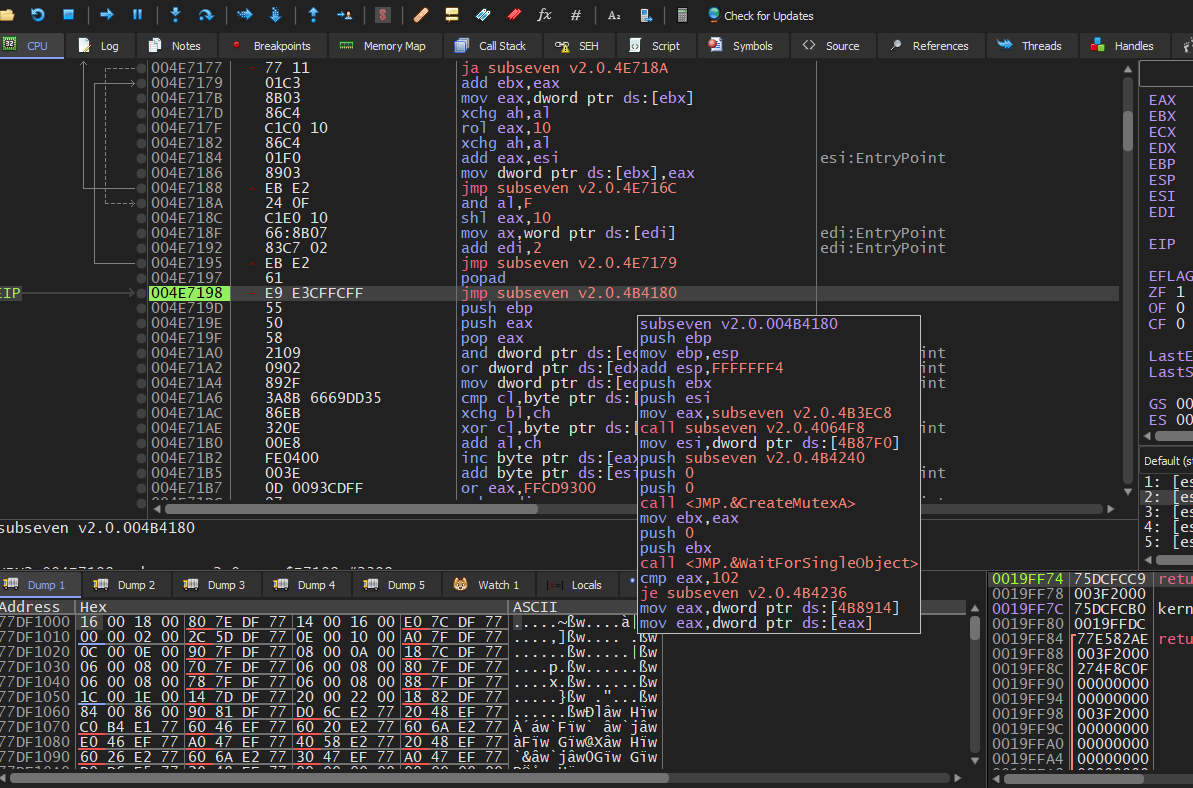
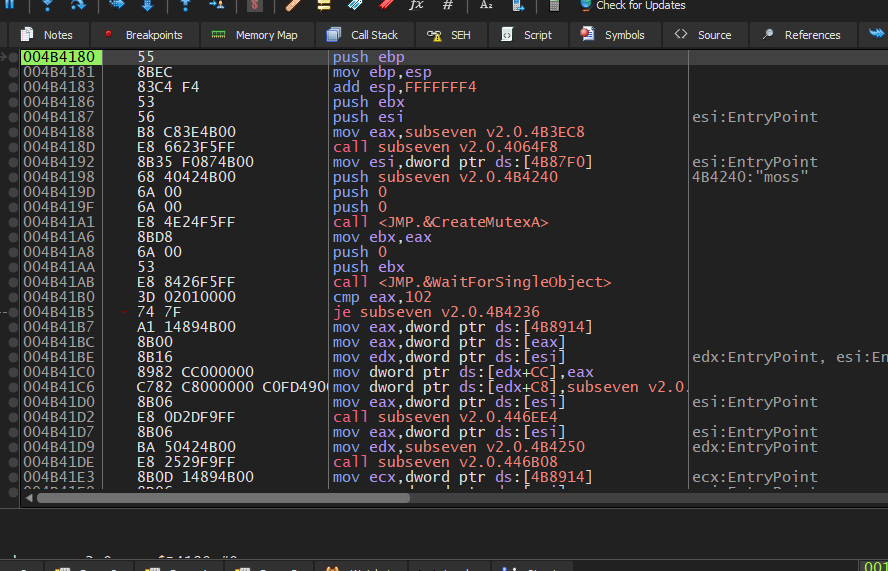

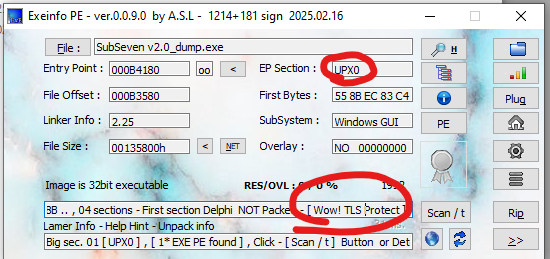
Everything initially appeared successful. However, when I opened the unpacked payload with ExeInfo, it was still detected as UPX-packed. Additionally, TLS protection was present.
After opening the file in Ghidra, the results confirmed this observation:
If a payload is protected by TLS (Thread Local Storage), the dumped PE file may not function correctly. Therefore, I verified whether TLS protection was actually being used.
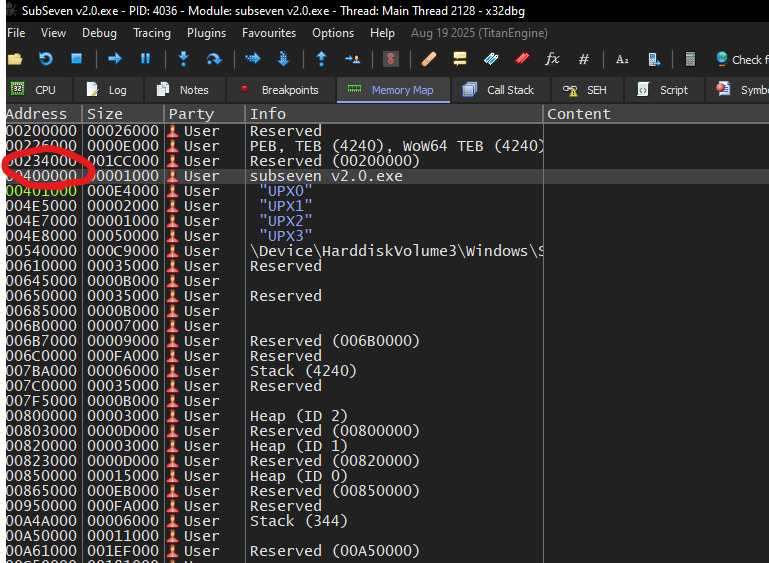
To do so, we need to locate the TLS Directory. First, navigate to the entry point of the main module using the Memory Map in x32dbg:
Next, right-click the main module and select Follow in Dump:
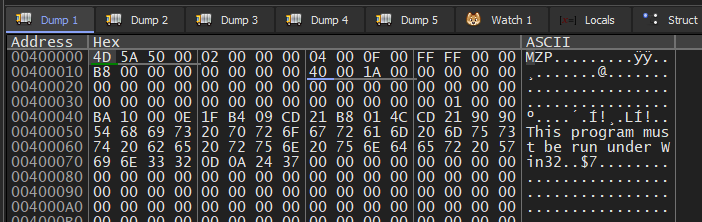
The MZ signature of a PE file is visible.
Then, locate the value of e_lfanew (PE header offset):1
Address(e_lfanew) = BaseAddress + 0x3C

The 4-byte result is: 00 01 00 00. Since the system uses little-endian format, the PE header offset is 0x0100. Therefore:
1 | |
Navigate to this address in x32dbg:
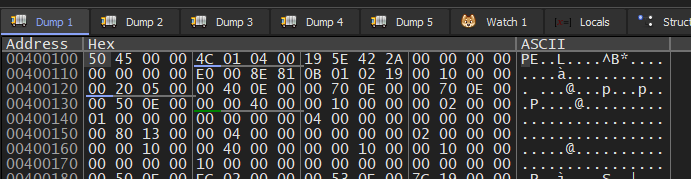
The data: 50 45 00 00 confirms the PE signature. Otherwise, the PE file might be damaged.
Next, locate the DataDirectory:1
2PE signature size = 4 bytes
IMAGE_FILE_HEADER size = 20 bytes
1 | |
1 | |
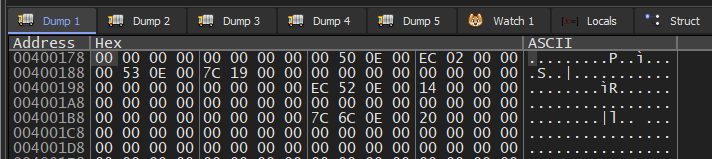
Each directory entry occupies 8 bytes. The TLS directory is the 9-th entry. Therefore:1
2
3
4TLS
= 0x00400178 + (8 × 9)
= 0x00400178 + 0x48
= 0x004001C0
Notice that the value of AddressOfCallbacks is zero, indicating that no TLS callback is defined. Therefore, it is reasonable to assume that the TLS structure was added by Delphi by default.
After further studying, I confirmed that the Import Address Table (IAT) of the dumped PE file was not properly fixed. Therefore, it needed to be repaired using Scylla. (Scylla also provides functionality for rebuilding the IAT after identifying the correct OEP.)
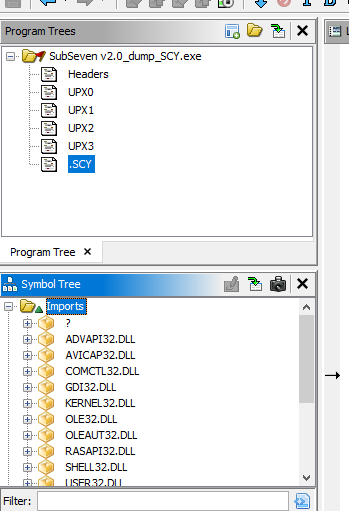
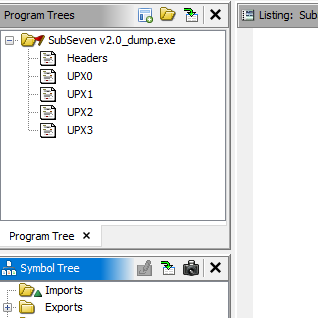
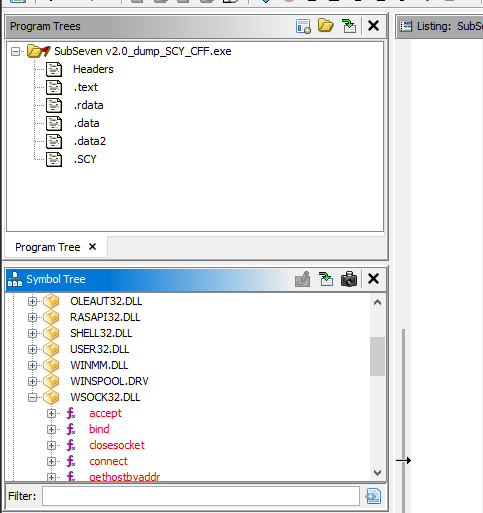
The sections displayed in Program Trees were still incorrect. In this case, the payload can be modified using CFF Explorer:
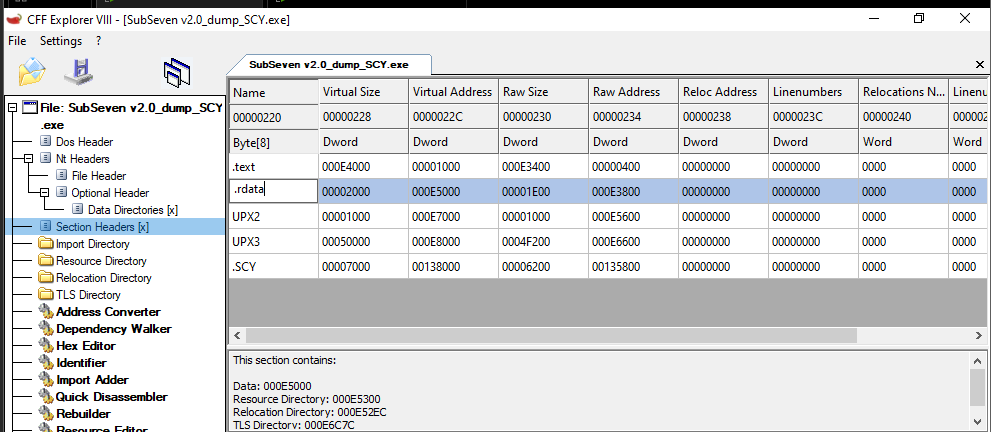
Note that the Raw Size should be adjusted to match the Virtual Size, and the SizeOfImage value must also be corrected:
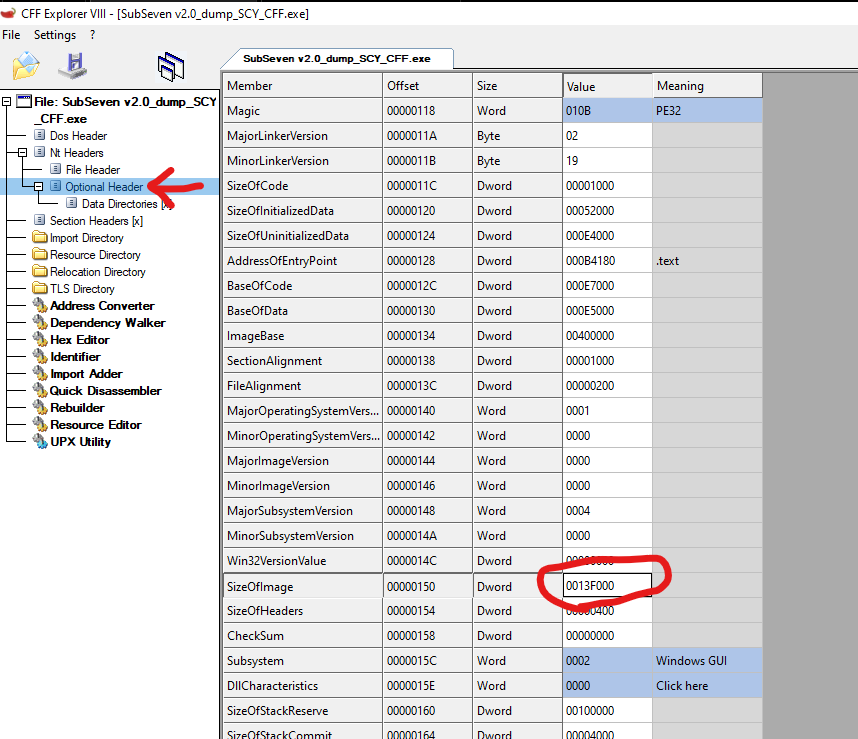
After performing these steps, the payload can be properly analyzed in Ghidra
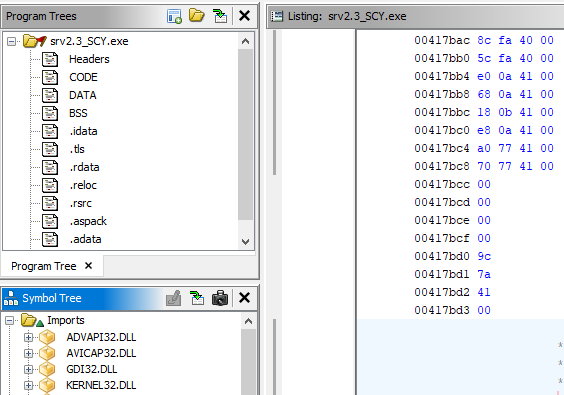
I also successfully unpacked version 2.3 payload, which is packed with ASPack. The unpacking method will be covered in a separate article.
Update: Read manual unpacking method here: Click me!
Message Handler
Since we already identified the plain text used for C2 communication during protocol analysis, we can locate the message handler using Ghidra.
Originally, the function appears as follows in Ghidra:1
void UndefinedFunction_004a6bf4(int *param_1,undefined4 param_2)
In this case, navigate to the address 004a6bf4 in the Listing view and create a new function:
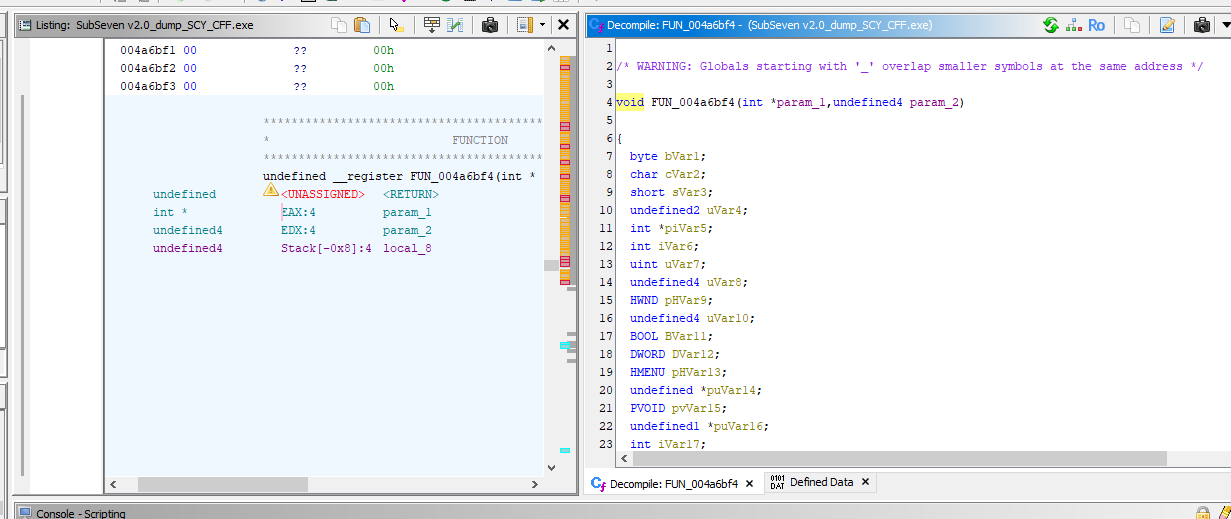
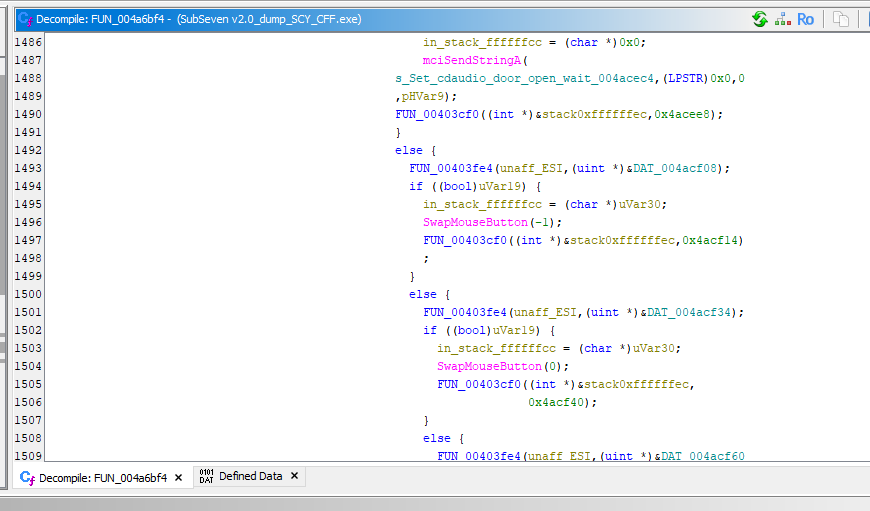
Although the message handler looks quite complex at first glance, we can still understand its mechanism. Like the majority of RATs, it identifiers different C2 commands using integer values and responds accordingly to the controller.
Conclusion
The most challenge part of this analysis was unpacking the payload. During this process, I could hardly find a tool for easily unpacking a payload packed with an obsolete version of UPX. After further investigation with x32dbg, I noticed that the payload was likely packed with UPX 0.72.
ALthough manual unpacking was quite difficult for me as a begineer, I learned a great deal from the process. It also helped me successfully unpack with ASPack. Additionally, this exercise served as a valuable review of the PE file format.
THANKS FOR READING